5. Allgemeine Funktionen in Meetings
Entdecken Sie die praktischen Grundfunktionen, die Sie während eines Meetings unterstützen.
Notiz: - Alle Funktionen die man als normaler User hat
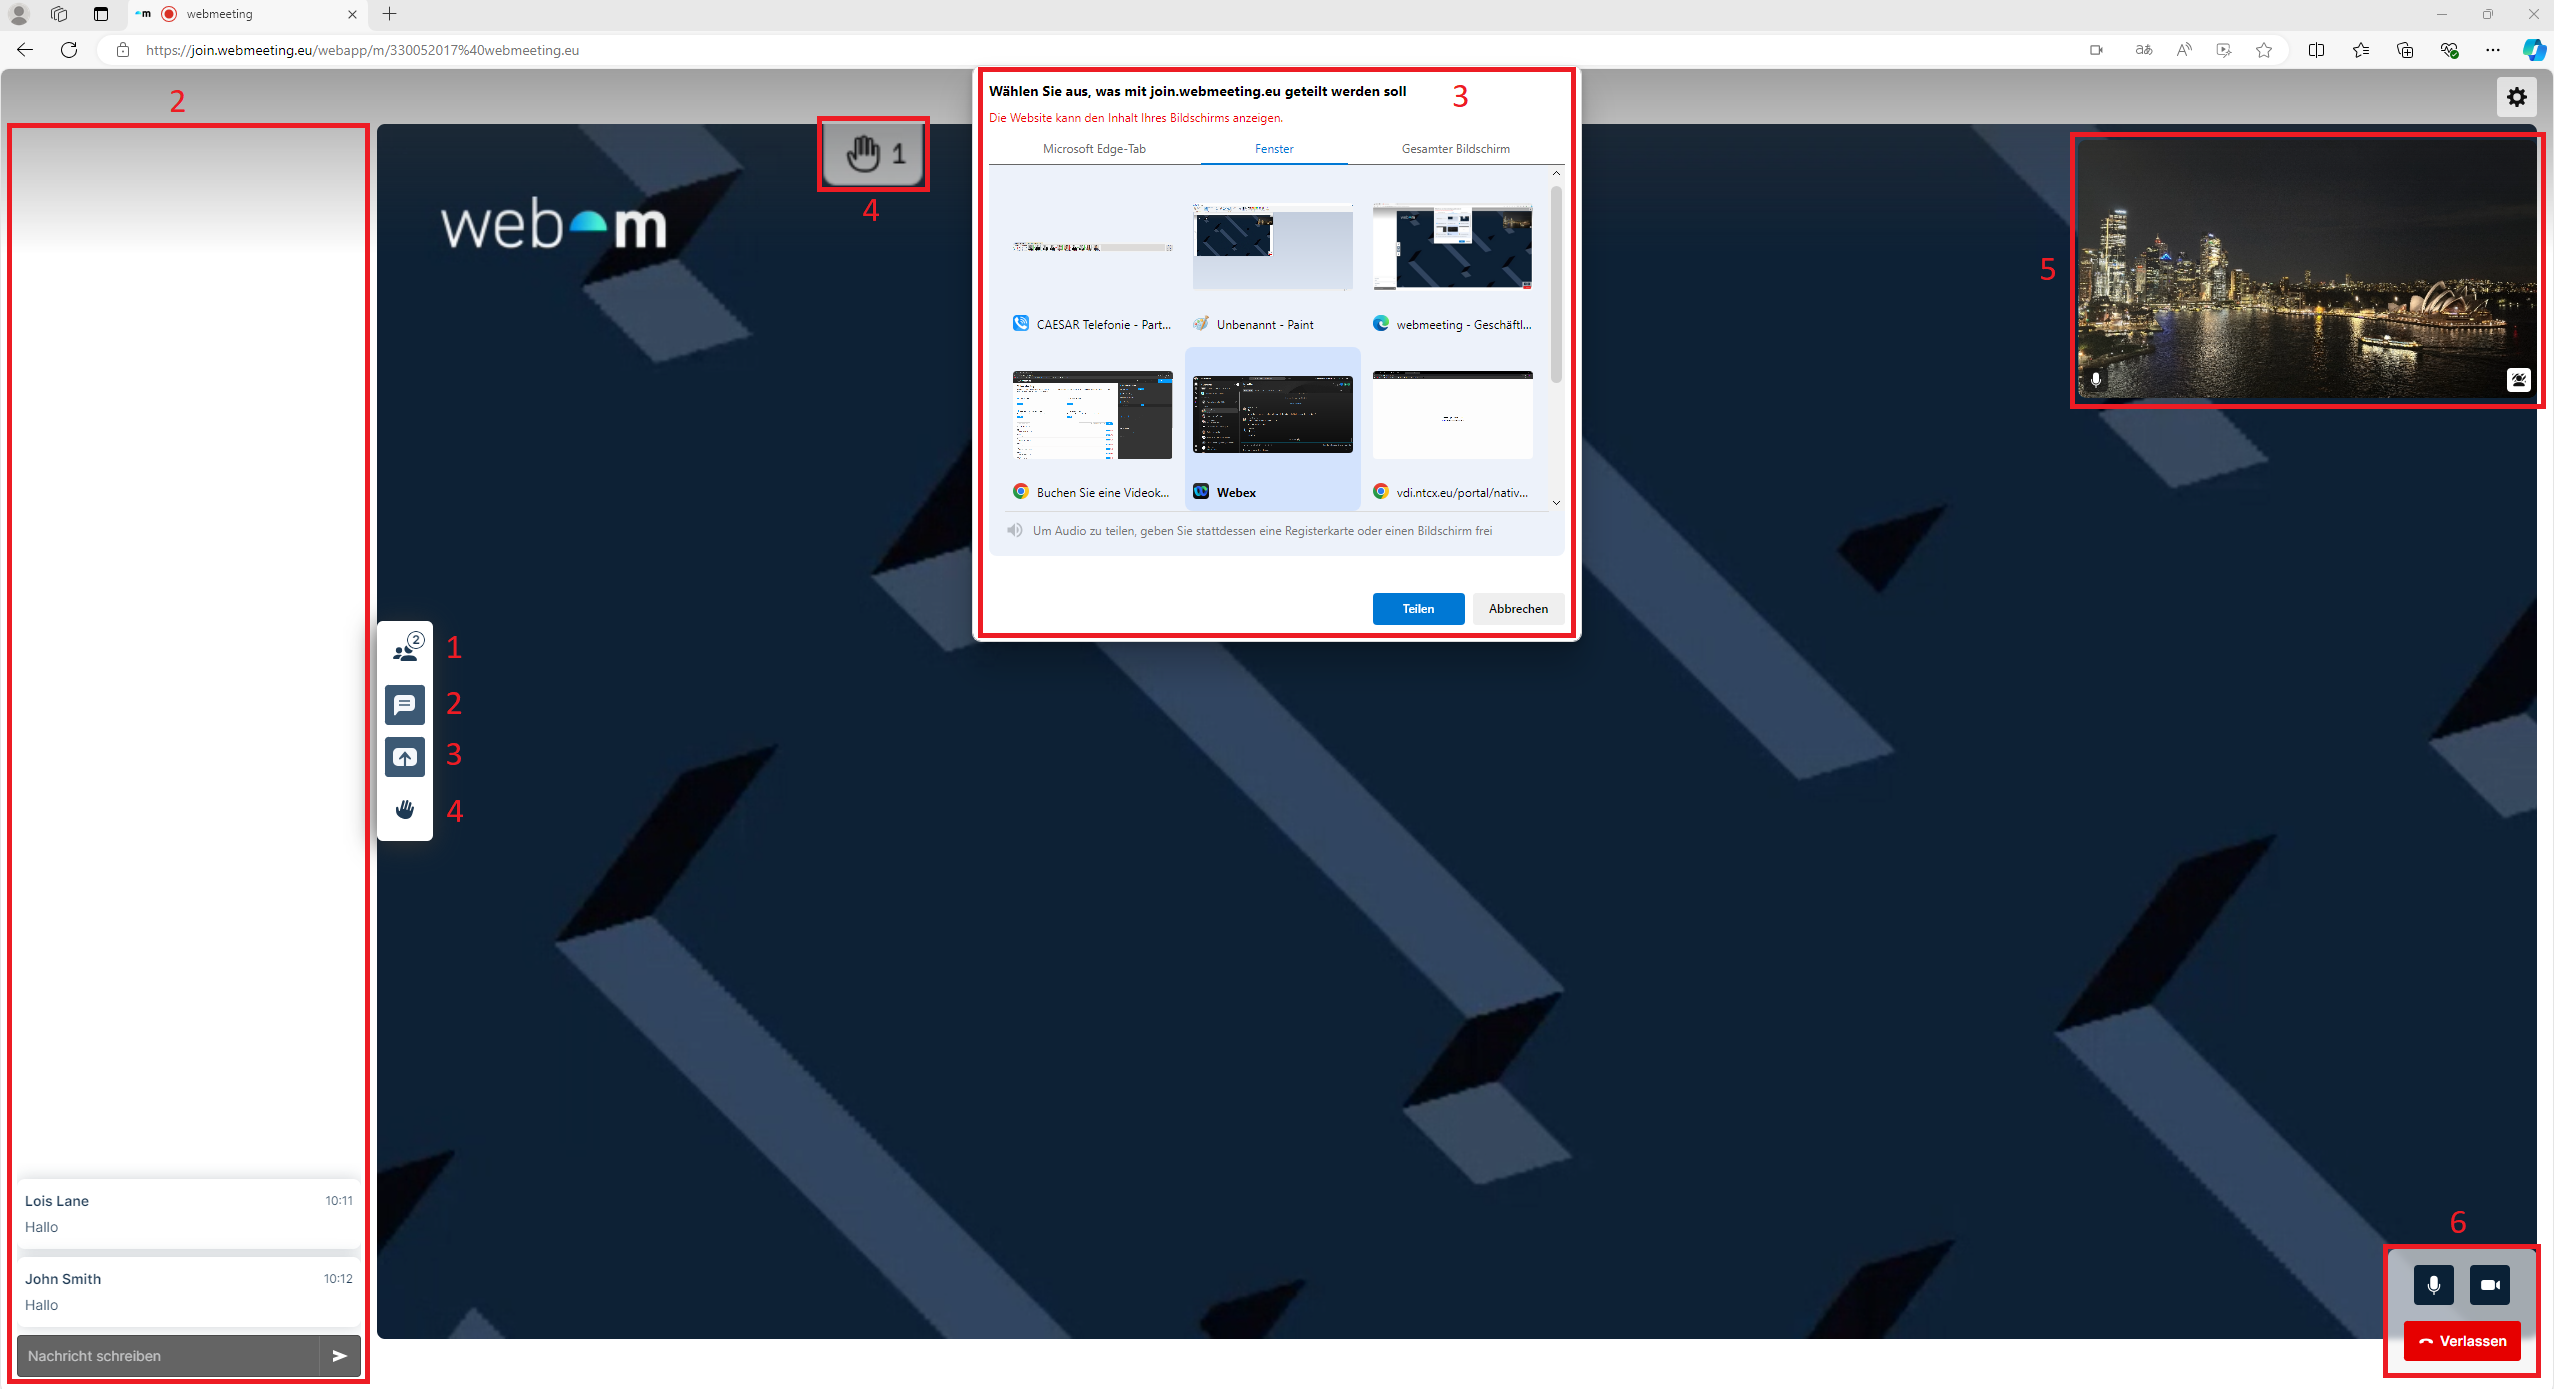
1. Teilnehmeranzeige
Über den obersten Knopf, kann die Teilnehmeranzeige aufgerufen werden. Diese zeigt in einem Fenster auf der rechten Seite an (in Abb. nicht zu sehen), welche Teilnehmer sich in dem Meeting befinden und ob diese einen Moderatorstatus haben, oder nicht.
2. Chat
Über den zweiten Knopf kann das Chatfenster geöffnet werden. Das Fenster öffnet sich auf der linken Seite der Besprechung. Dabei werden von unten nach Oben die Chatnachrichten, einschließlich der Uhrzeit des Absendens angezeigt. Am unteren Ende des Chatfensters befindet sich das Feld, in welches die gewünschte Nachricht geschrieben und über den Pfeil auf der rechten Seite abgeschickt werden kann.
3. Inhalte freigeben/ teilen
Über den dritten Knopf können Inhalte freigegeben werden. Dabei gibt es die Möglichkeit den ganzen Bildschirm zu teilen, oder nur einzelne Fenster bzw. Anwendungen. Möchten Sie gerne einen Inhalt teilen, bei dem die anderen Besprechungsteilnehmer auch Musik und Ton hören sollen, geschieht dies nur über das freigeben des gesamten Bildschirms.
4. Hand heben
Mit dem untersten Knopf kann die Hand gehoben werden, um während eines Meetings zu signalisieren, dass man zum Beispiel etwas sagen möchte. Des weitern wird am oberen Ende des Besprechungsfensters angezeigt, wie viele Teilnehmer ihre Hand gehoben haben.
5. Eigenansicht
Die Eigenansicht in einem Meeting ist ein kleines Vorschaufenster, das in der oberen rechten Ecke des Bildschirms angezeigt wird. Es zeigt Ihnen, wie Sie von den anderen Teilnehmern gesehen werden, inklusive der eigenen Kameraeinstellungen. Diese Ansicht hilft, die Position und Beleuchtung zu überprüfen, sowie sicherzustellen, dass der Hintergrund passend ist.
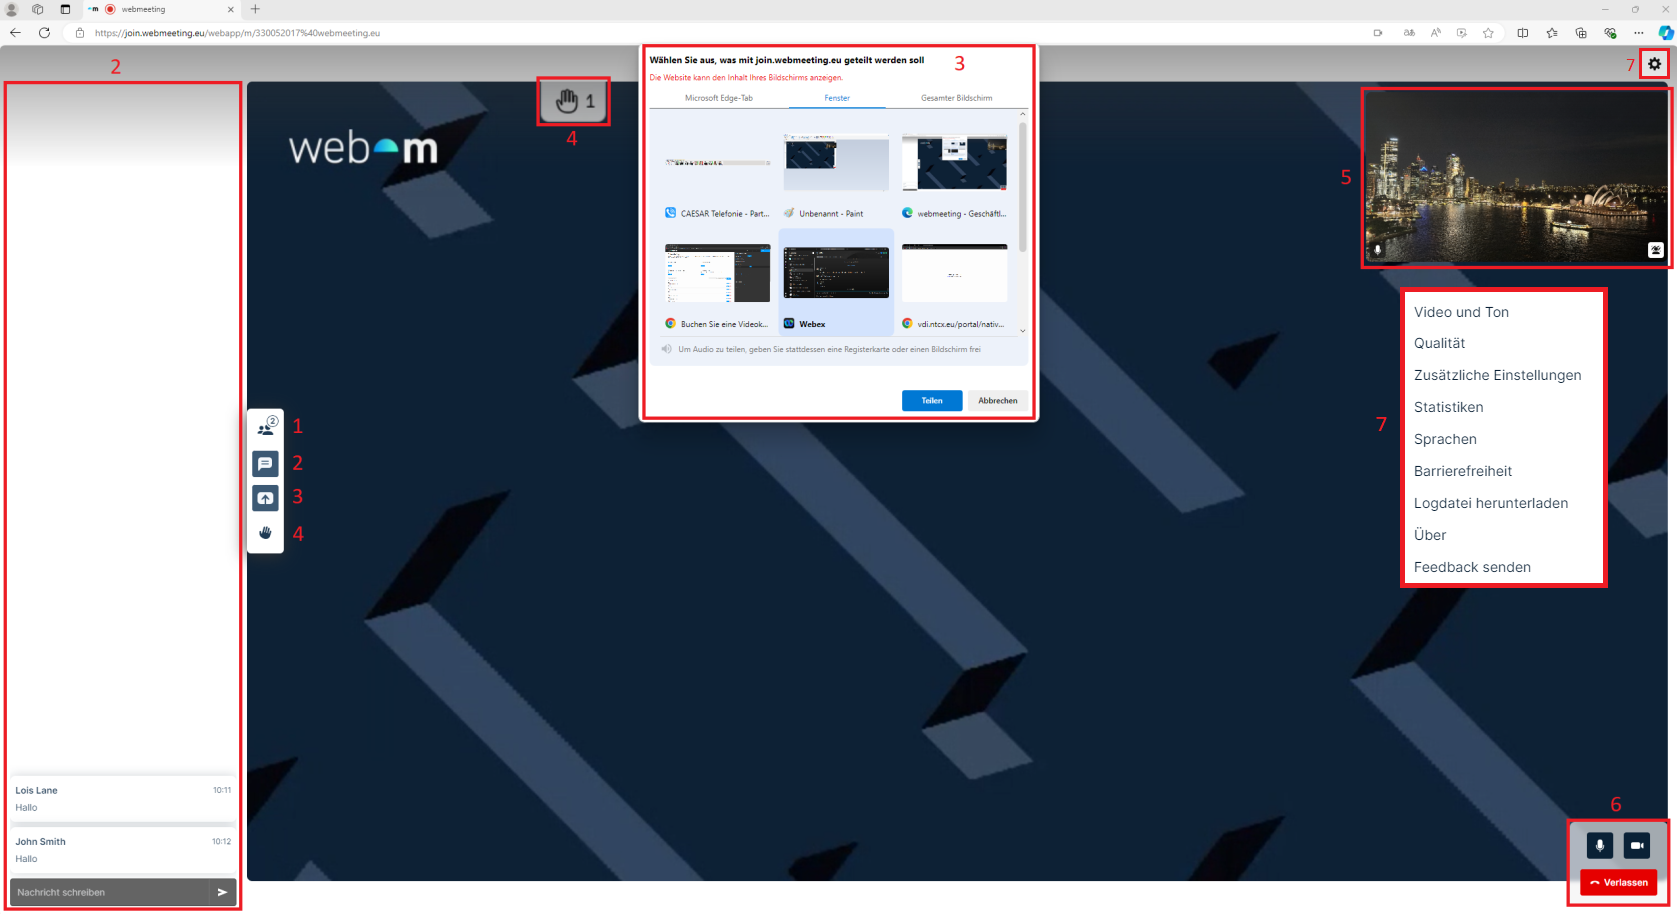
6. Kontrollzentrum
Hier können Sie ihr eigenes Mikrofon und ihre Kamera aus- und einschalten. Des weiteren können Sie das Meeting "verlassen".
7. Einstellungen
| Video and sound | ||
| Enable or disable your camera or microphone |
|
 |
| Blur or replace your background | Select the Background effects icon |
|
| Change your camera, microphone or speakers |
Use the drop-down options to select the camera, microphone and speakers you wish to use.
|
|
| Noise suppression |
Enable this option to use Pexip's noise suppression feature, which reduces the volume of non-speech background noise in the audio you are sending to the meeting. If this feature is disabled, your device may instead use its own noise suppression functionality, if available and compatible with your browser. This option is disabled by default. |
|
| Prioritize sharing motion |
Enable this option to prioritize motion over sharpness when sharing content with other participants. This is the best option when sharing video; the image will be less sharp, but the motion will be smoother. Leave disabled to prioritize sharpness. This is the best option when sharing static presentations and images. This option is disabled by default. |
|
| Far-end camera control |
This setting controls whether the currently selected camera can be controlled (if it supports pan/tilt/zoom, or zoom-only) by another participant — either another Connect app user, or a SIP/H.323 endpoint user (supported in gateway calls only). See Control another participant's camera for more information. The Connect web app requires Chrome version 87 or later. You can go to chrome://media-internals/ to check if your device's camera supports pan/tilt/zoom. Your browser will also ask for permission to allow your camera to be controlled:
This option is disabled by default. |
|
